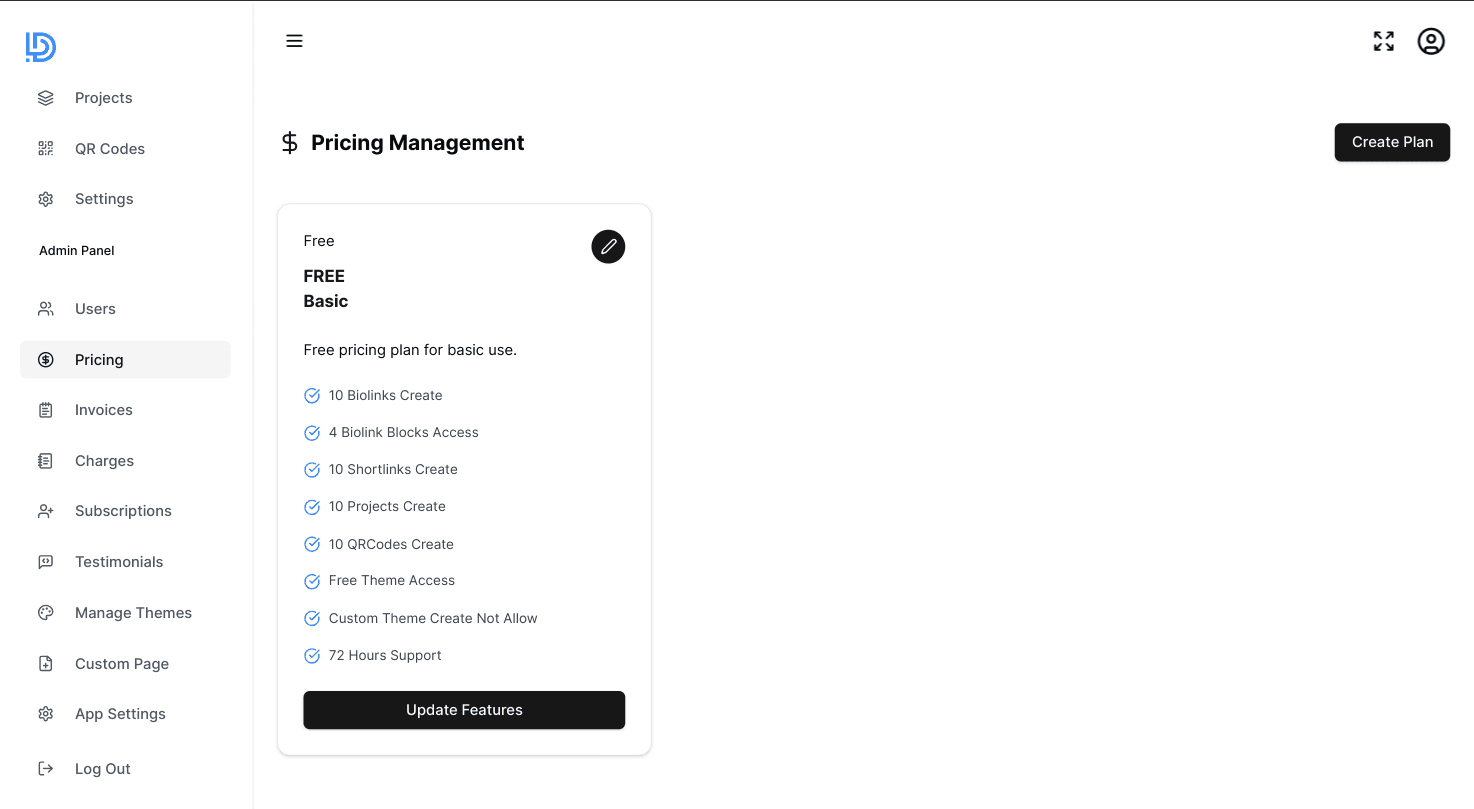
Pricing Management
Create and manage subscription plans for your application. Set up different pricing tiers with custom features to meet your users' needs and maximize revenue.
Creating a New Plan
-
Navigate to Pricing Management and click
Create Plan -
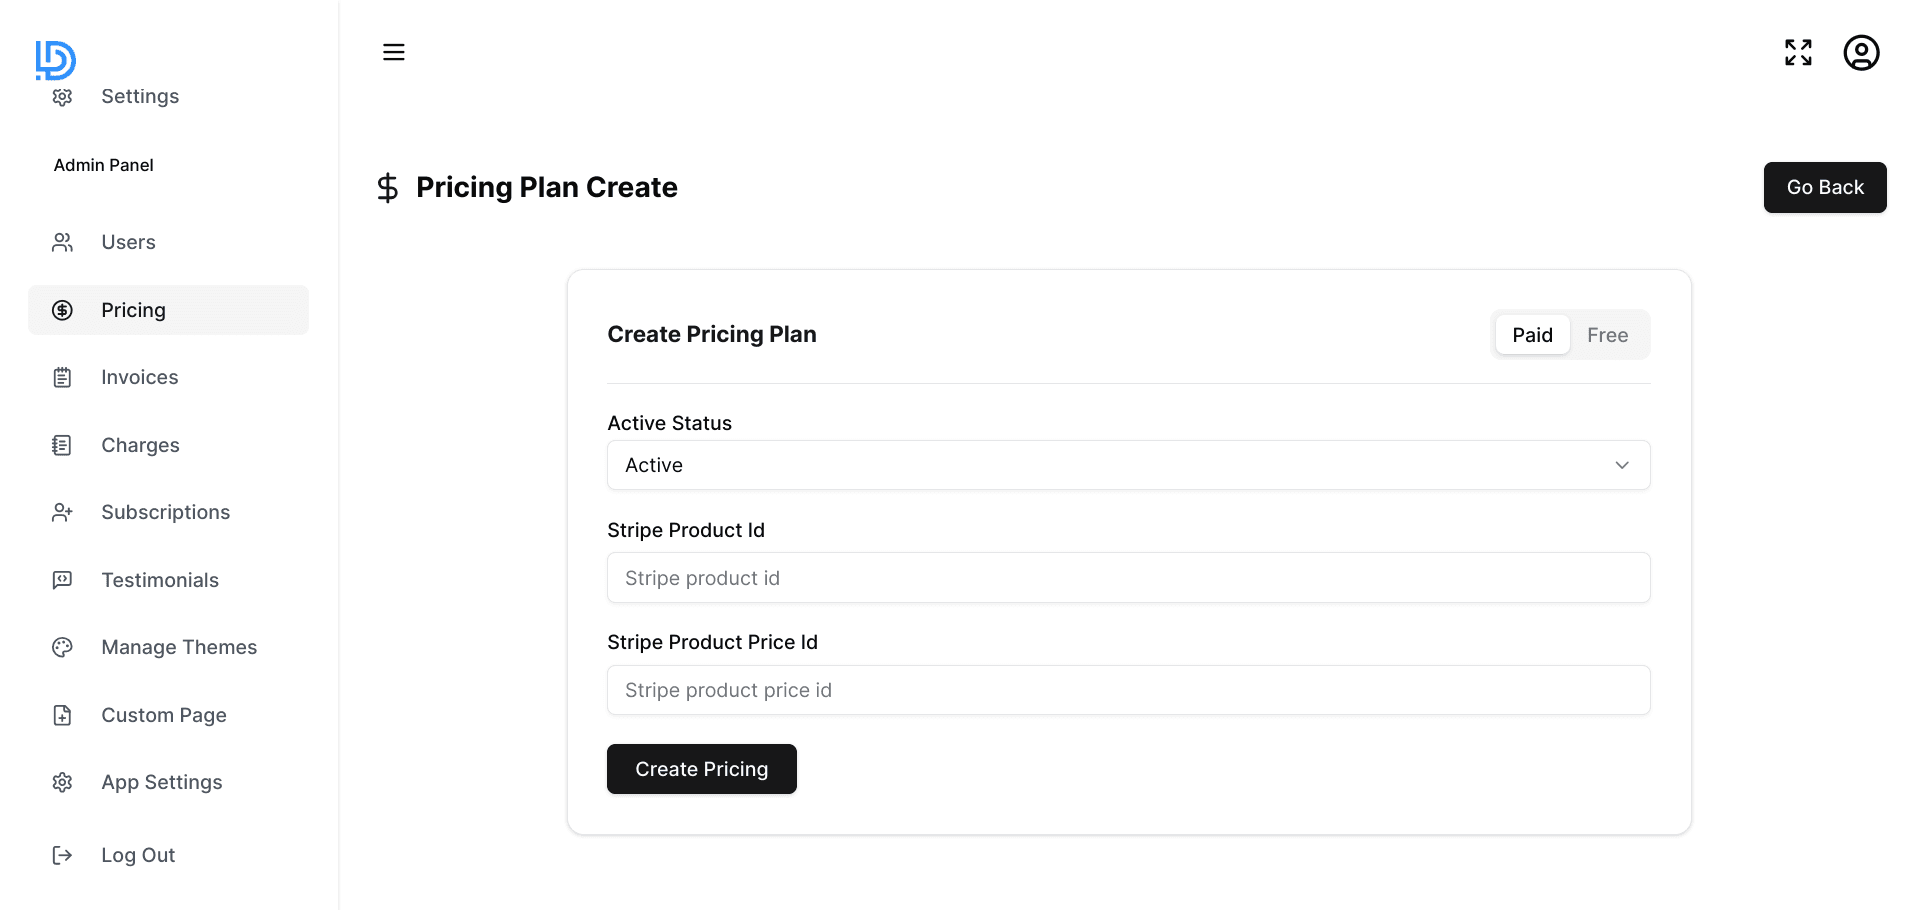
First, create a product and price in your Stripe Dashboard:
- Go to Stripe Dashboard (opens in a new tab)
- Click
Add Product - Fill in product details (name, description)
- Set pricing information:
- Amount and currency
- Billing period (monthly/yearly)
- Trial period (if any)
- Save the product
-
Get the required IDs from Stripe:
- Product ID: Find under product details (starts with 'prod_')
- Price ID: Find under pricing details (starts with 'price_')
Note: Create the product in Stripe first, then use its IDs in LinkDrop
Plan Configuration
When you add Stripe IDs, the system automatically imports:
- Product name and description
- Price and currency
- Billing interval (monthly/yearly)
- Trial period settings
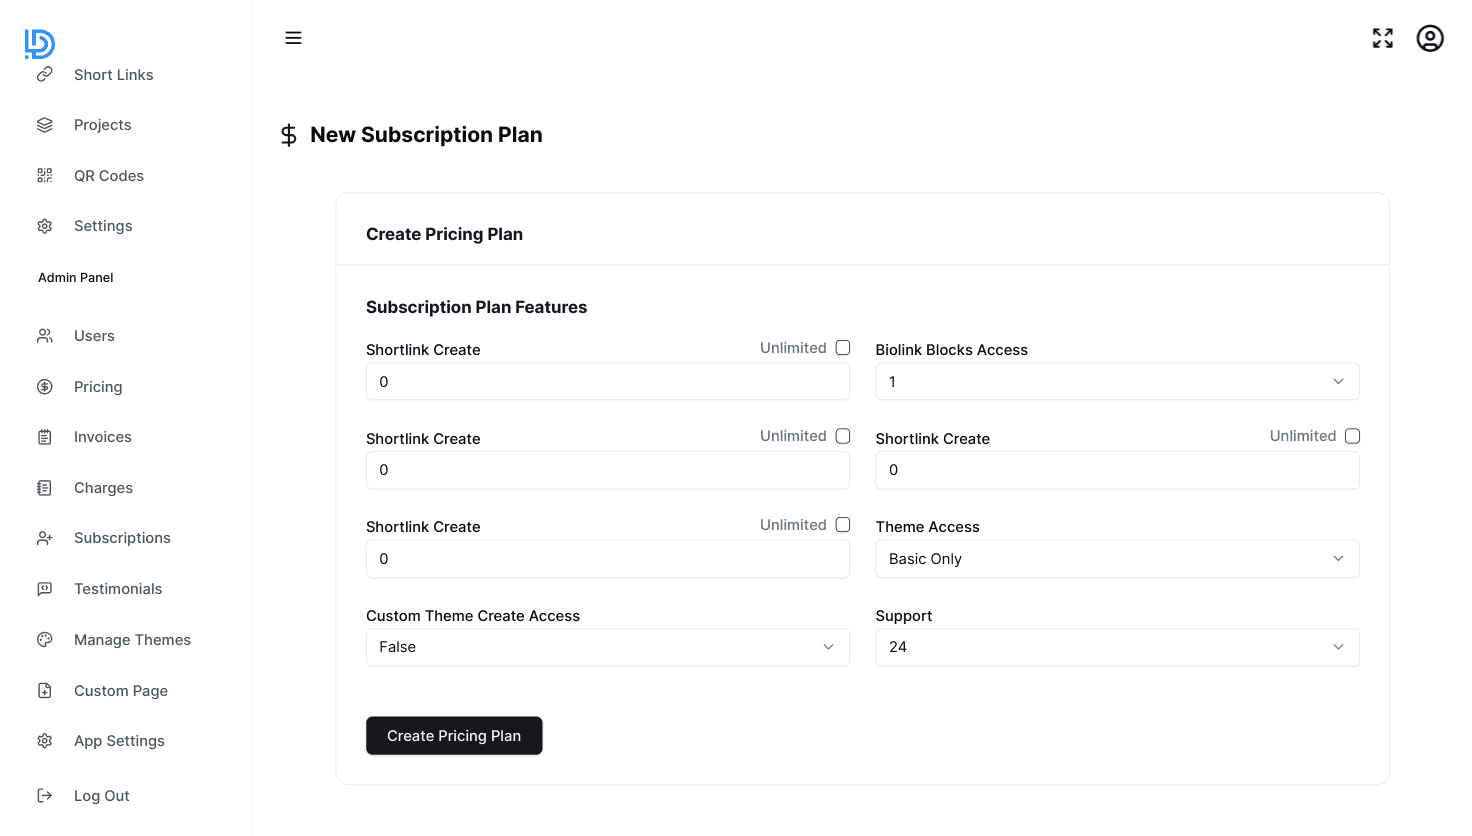
Managing Plan Features
Customize what each plan offers:
- Create the basic plan with Stripe details
- Click
Add Featureson your plan - Define features like:
- Number of links allowed
- Custom domains
- Analytics access
- Team member limits
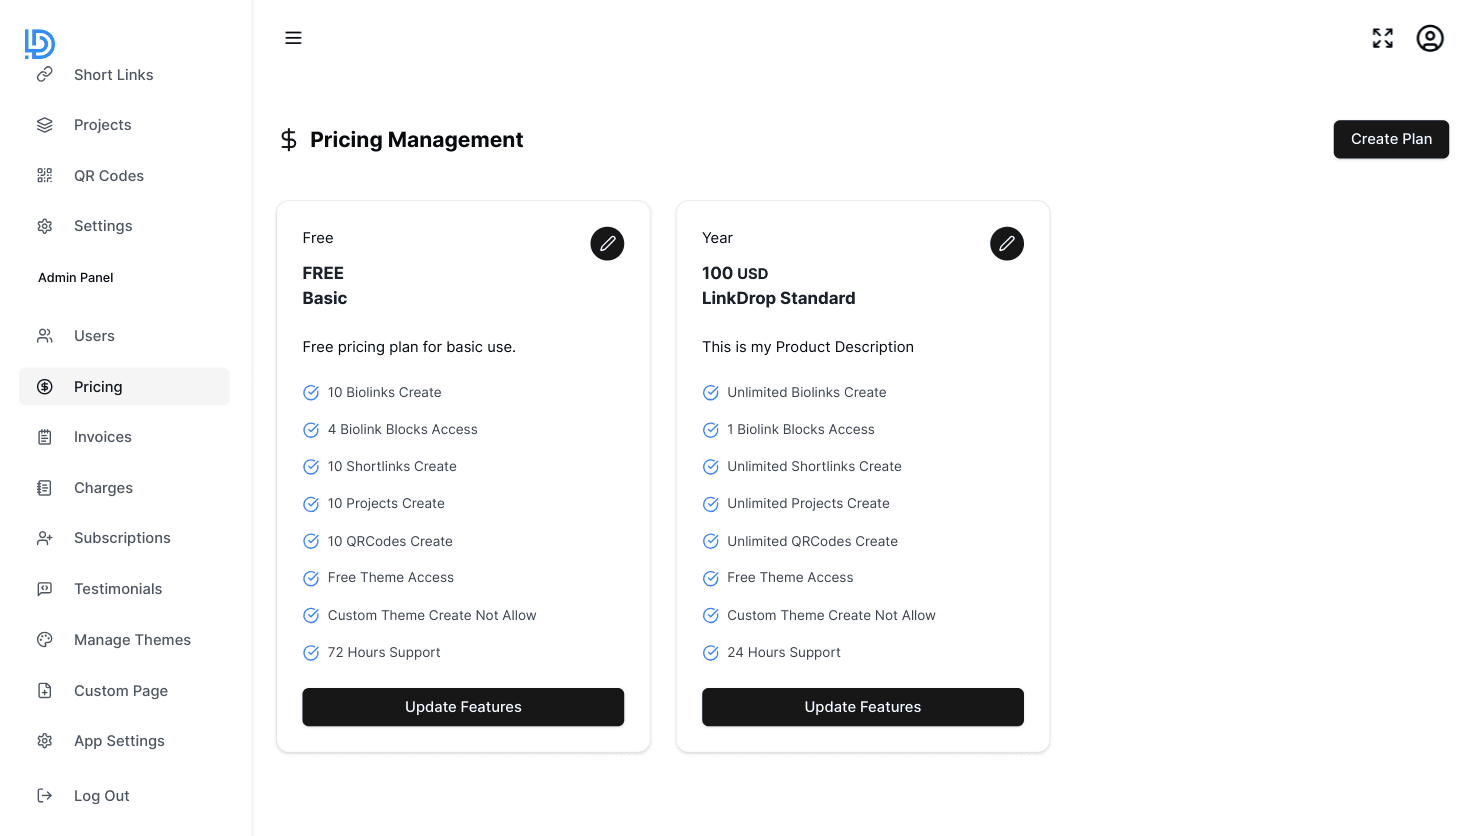
Reviewing Plans
After setup, you can view all plans with their:
- Price and billing details
- Included features
- Status (active/inactive)
- Number of subscribers
Updating Plans
Modify existing plans anytime:
- Go to Pricing Management
- Find the plan you want to change
- Click
Edit Plan - Update features or settings
- Save changes
Important: Changes to existing plans won't affect current subscribers until their next billing cycle