Installation
Step 1: Download Source Code.
First, you need to purchase the LinkDrop from codecanyon (opens in a new tab). After that, you have to download the source code as a zip file from there.
Step 2: Upload Source Code.
To install LinkDrop on your server, follow these steps:
- Upload the zip file to the server where you want to deploy the app
- Extract the contents of the zip file on your server
- Proceed to configure LinkDrop after extraction is complete
Step 3: Create a .env file
After extracting the LinkDrop source code on your server, you need to create an environment configuration file:
- Locate the .env.example file in the root directory of your extracted files
- Make a copy of this file and rename it to .env
After creating .env file, you need to browse your application using your domain to complete the other critical configuration including database setup, app settings, etc.
Step 4: Enable symlink() PHP Function
If you're using shared hosting, you'll need to enable the symlink() PHP function for proper application functionality.
If the symlink() function is already enabled on your server, you can skip this step.
Here are common methods to enable it:
Through cPanel:
- Log in to your cPanel account
- Navigate to 'Select PHP Version' or 'PHP Settings'
- Look for 'symlink' in the list of PHP extensions
- Enable the checkbox next to it
- Save the changes
Through PHP.ini (if you have access):
- Create or edit php.ini in your root directory
- Add the line:
enable_function = symlink - Save the file and restart PHP if required
Through Hosting Support:
- Contact your hosting provider's support team
- Request them to enable the symlink() PHP function
- Specify it's needed for Laravel application
- Wait for their confirmation
Necessary Setup
But before completing other installation processes you will need to create a database to store its data. After creating the database you have to collect the database name, database user name, and database password. This is an important step in the installation process, as the database details will be required to complete the necessary setup. With your database created and configured, you can then proceed to complete the LinkDrop installation and begin using its powerful features.
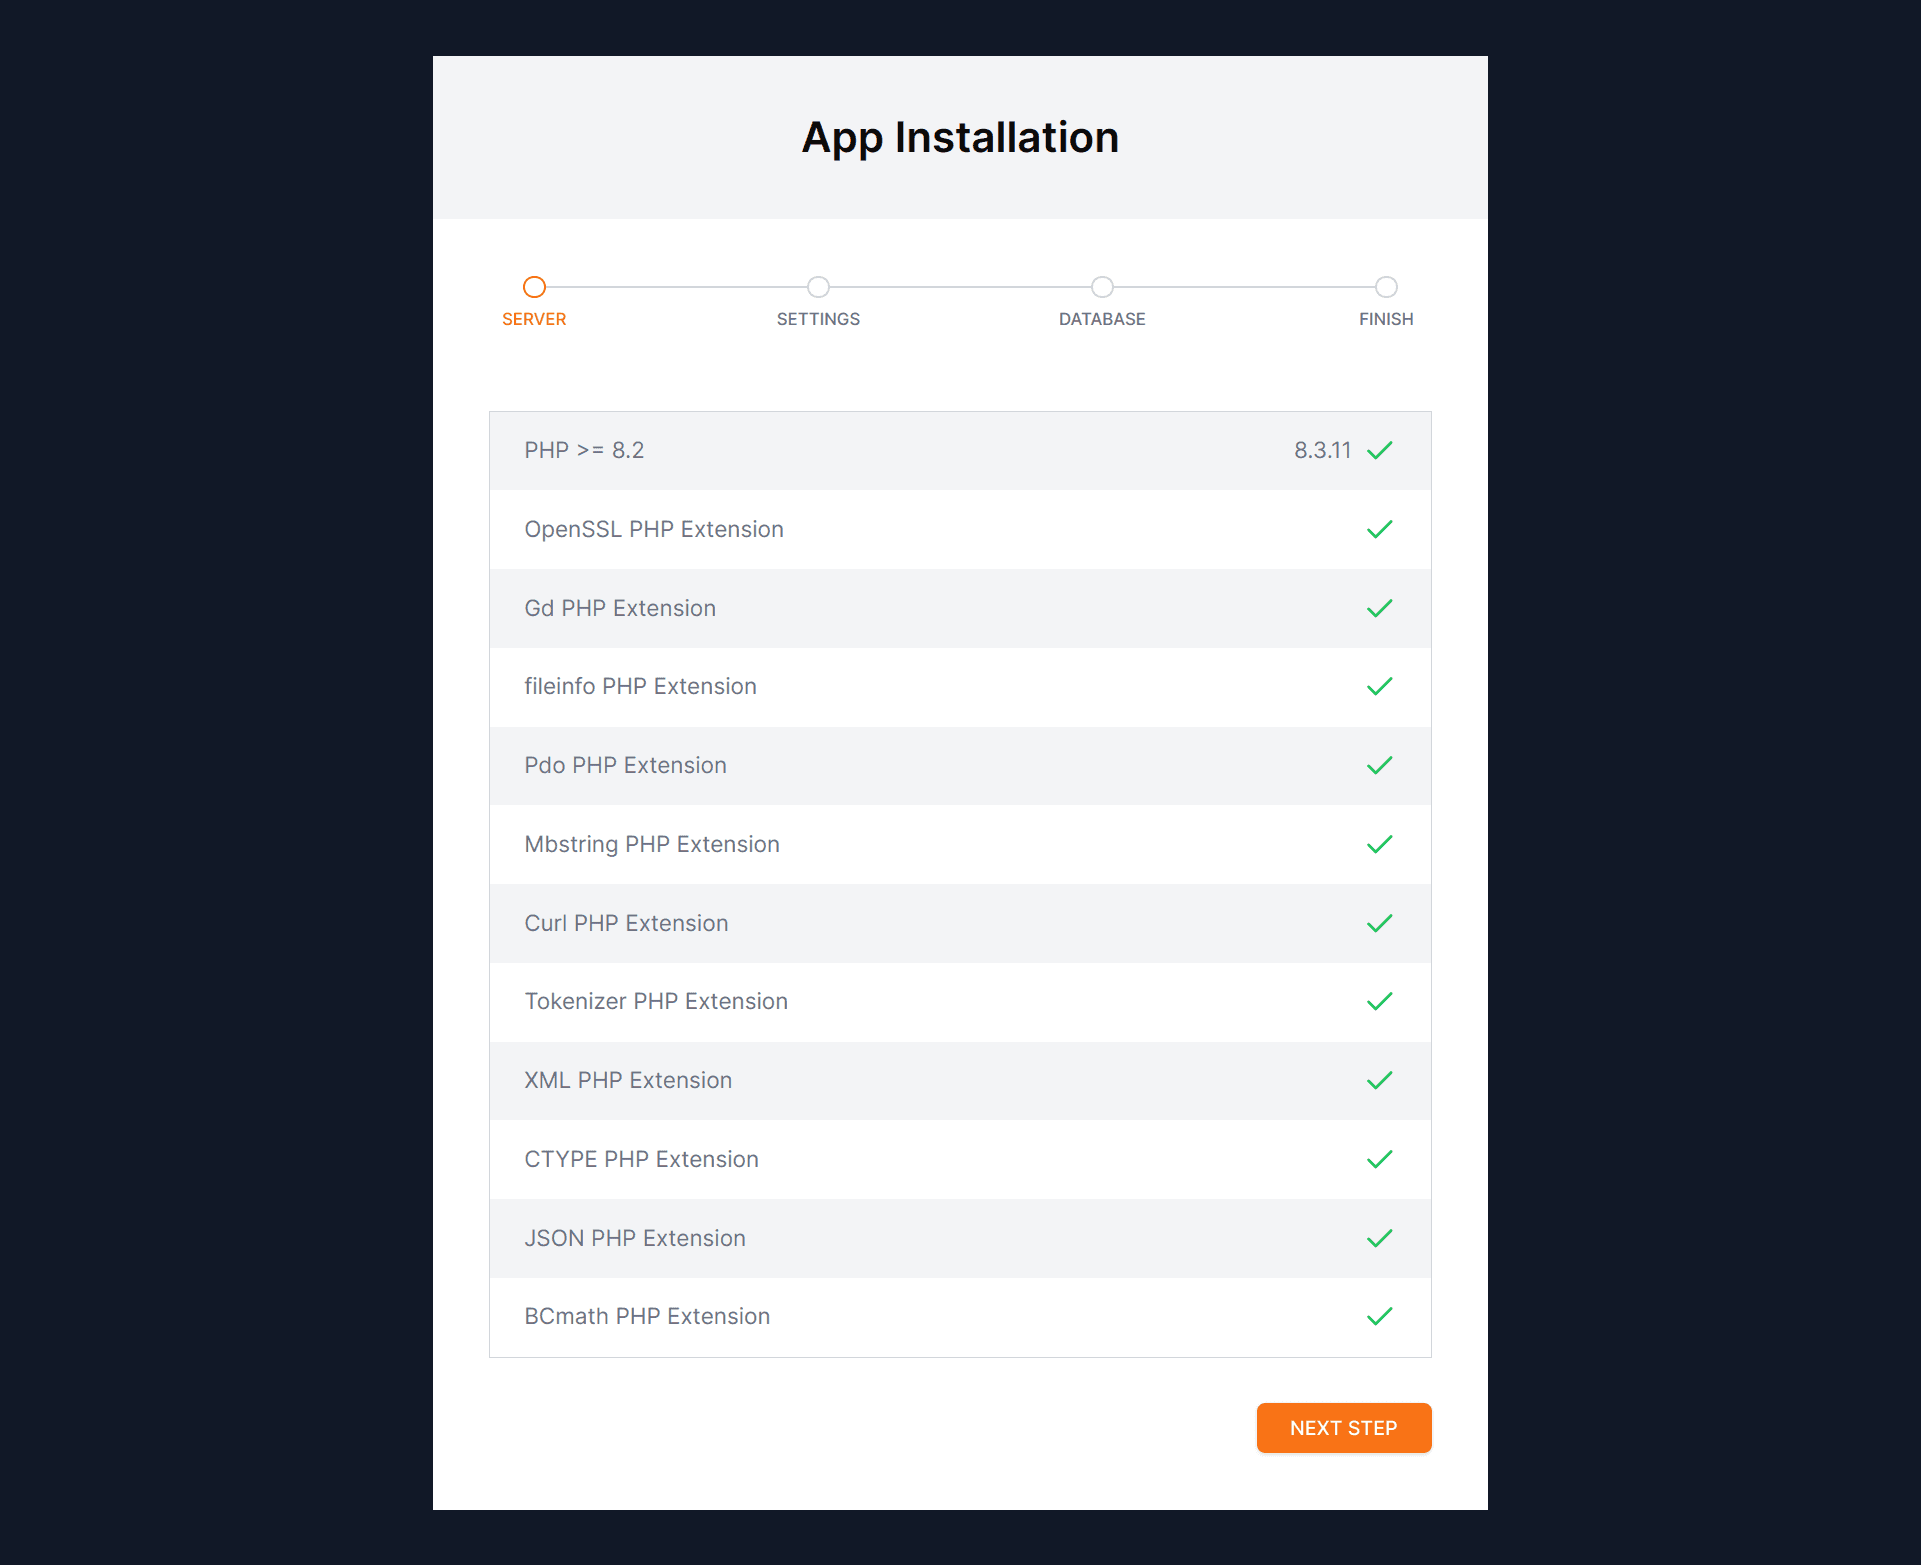
Step 1: Server Requirements
Now you need to browse your app from browser by your app domain. You will see some options to complete your app installation process. Here is the first one where you will see the server requirements. If these requirements are full-fill then you can go to the next step.
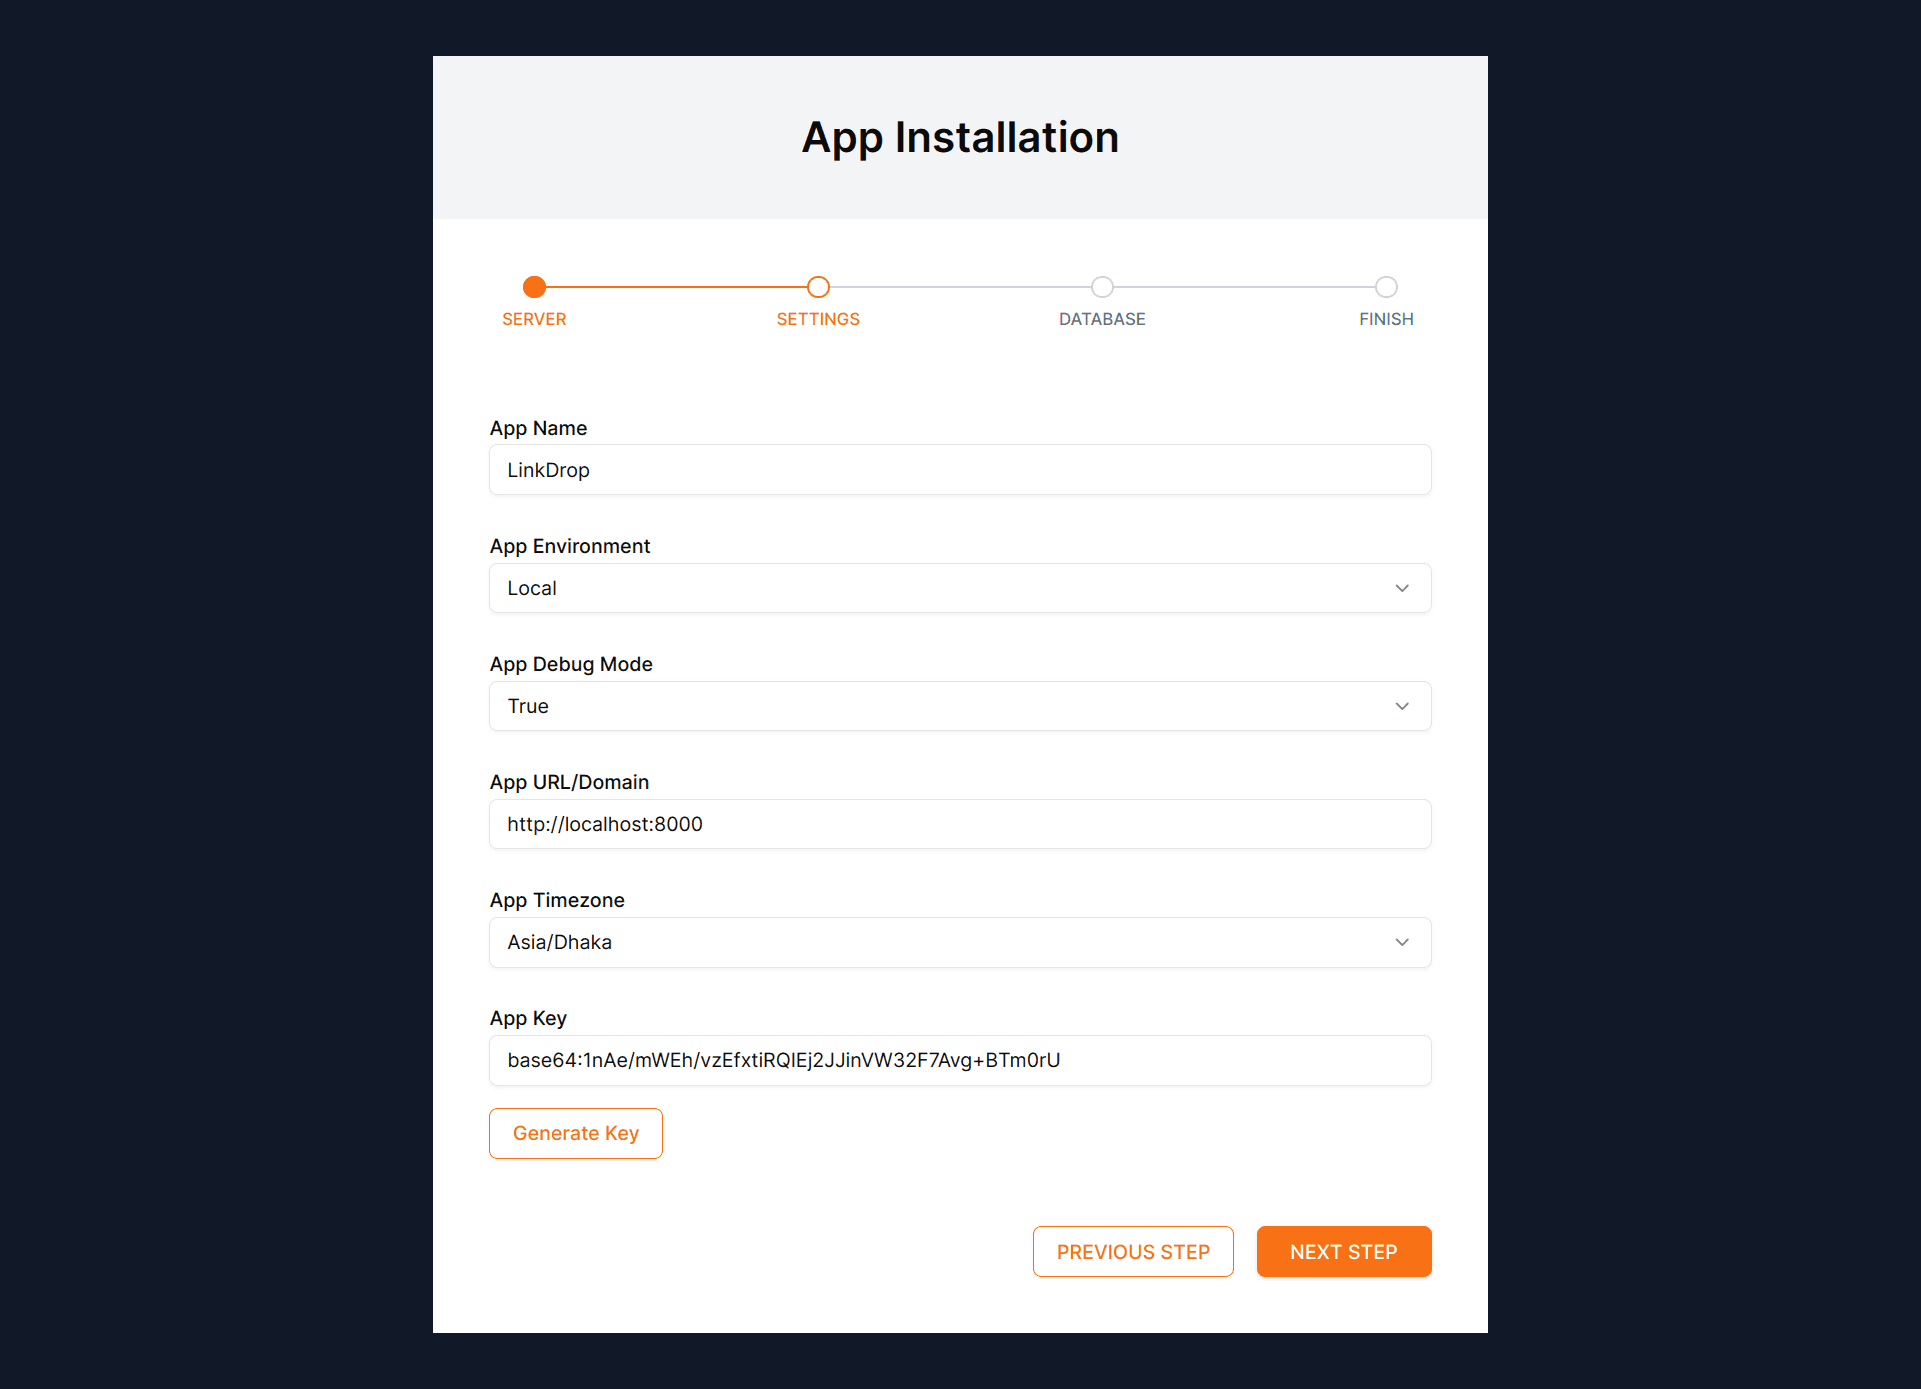
Step 2: App Settings
In this step, you can put your app name also you have to select your app
environment and app debug mode. Environment must be production and debug mode
must be false. If you want to generate a new app key then you can do it by
Generate Key button click.
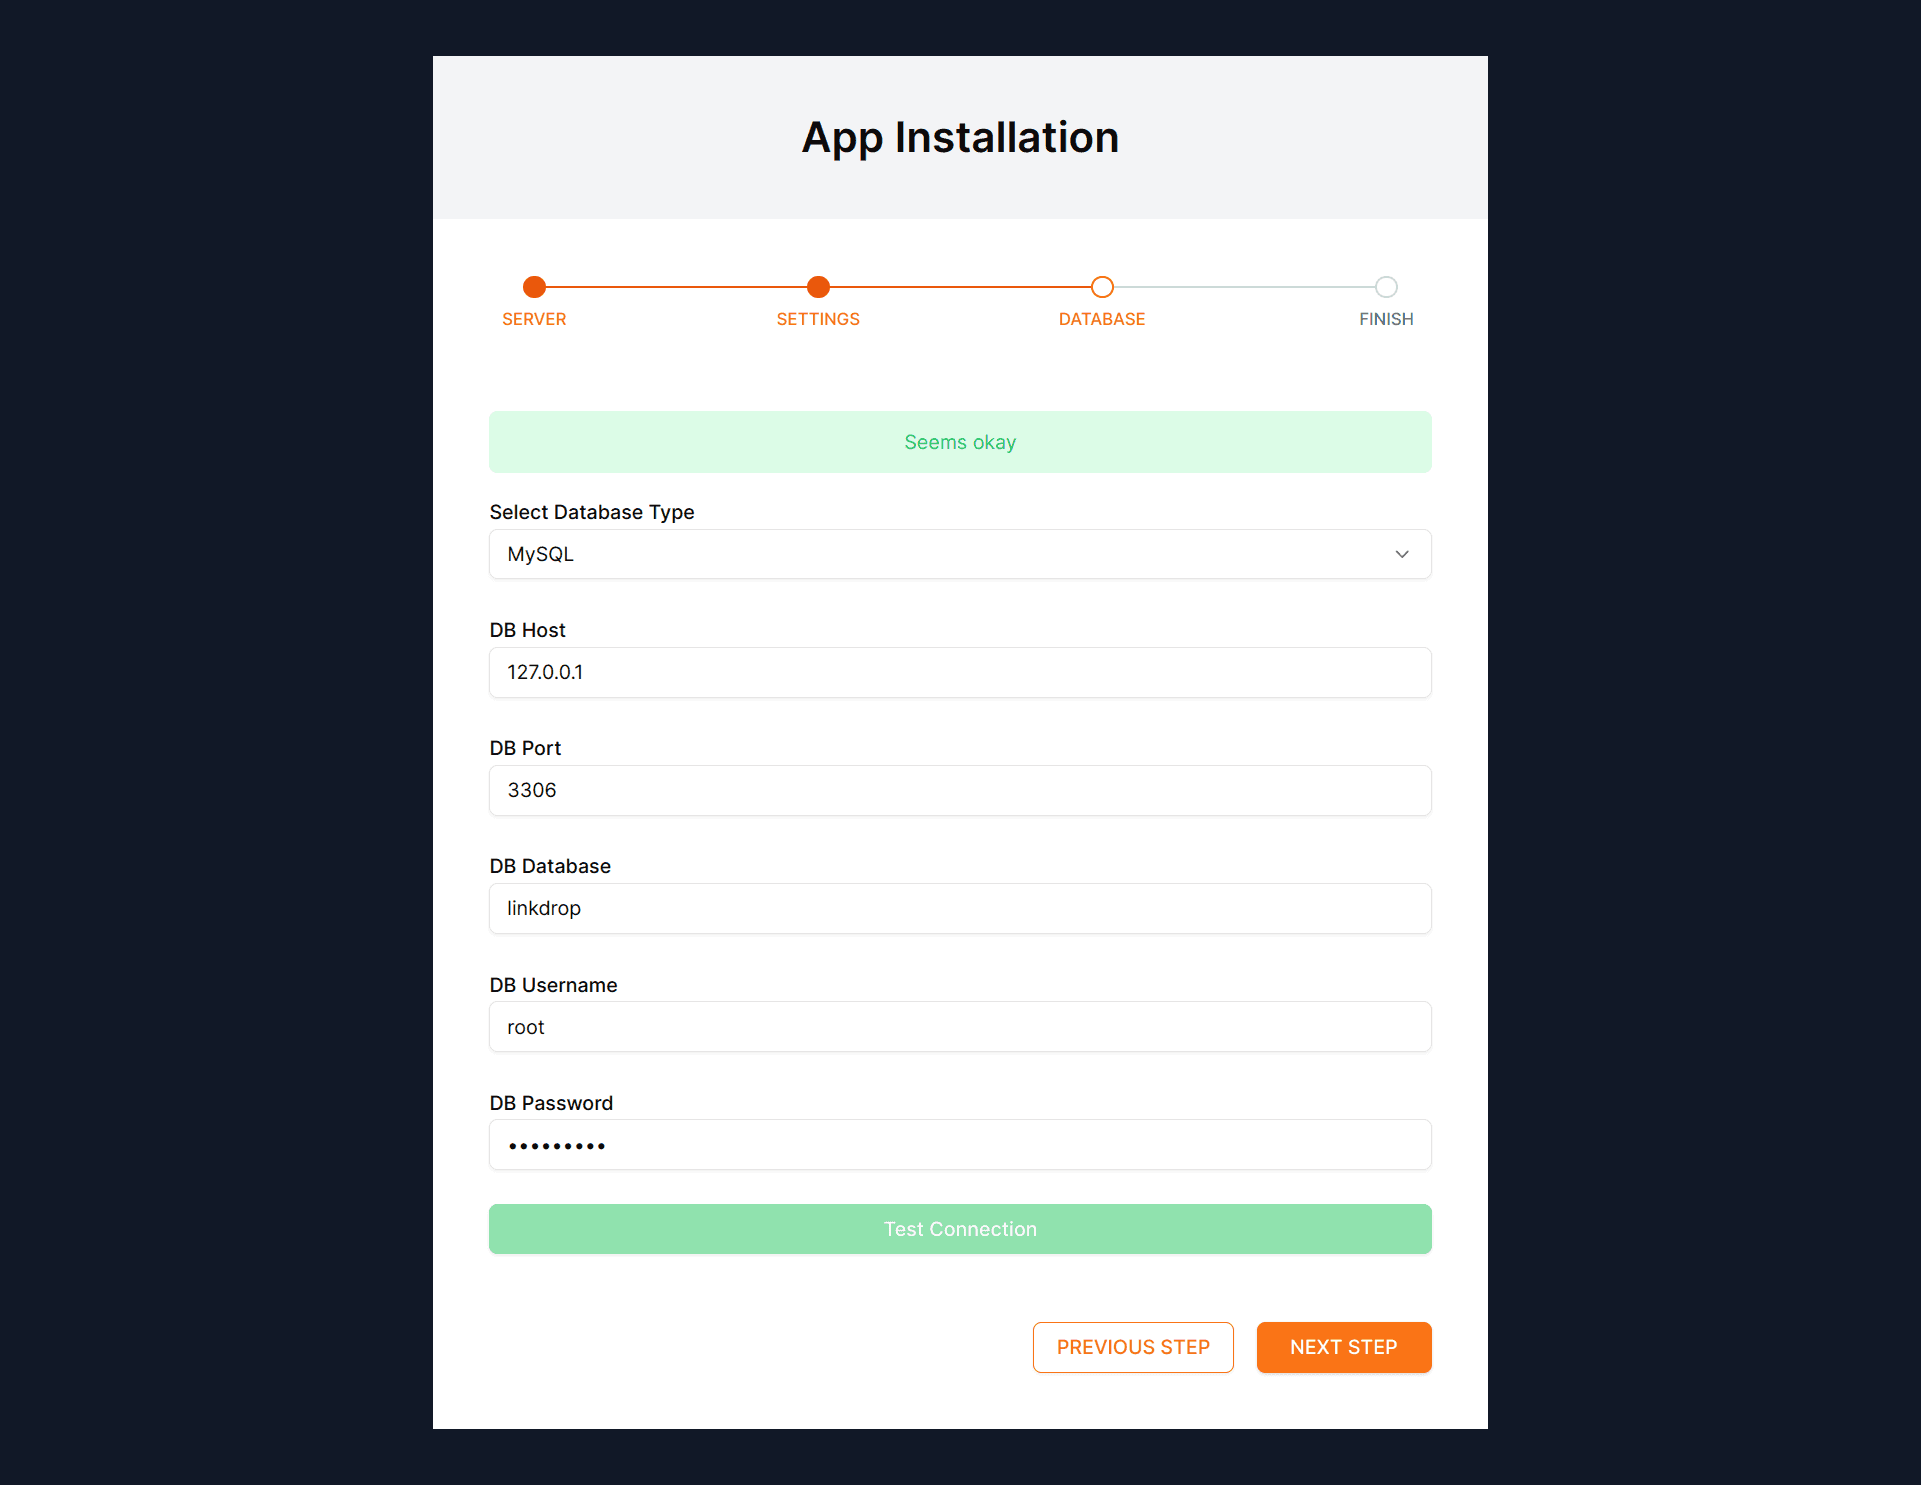
Step 3: Database Connection
Here is the third step, from here you have to connect your database with your
app. Please put the database name, database username, and database password
then you need to check the database by TEST CONNECTION button click whether
the database is connected or not.
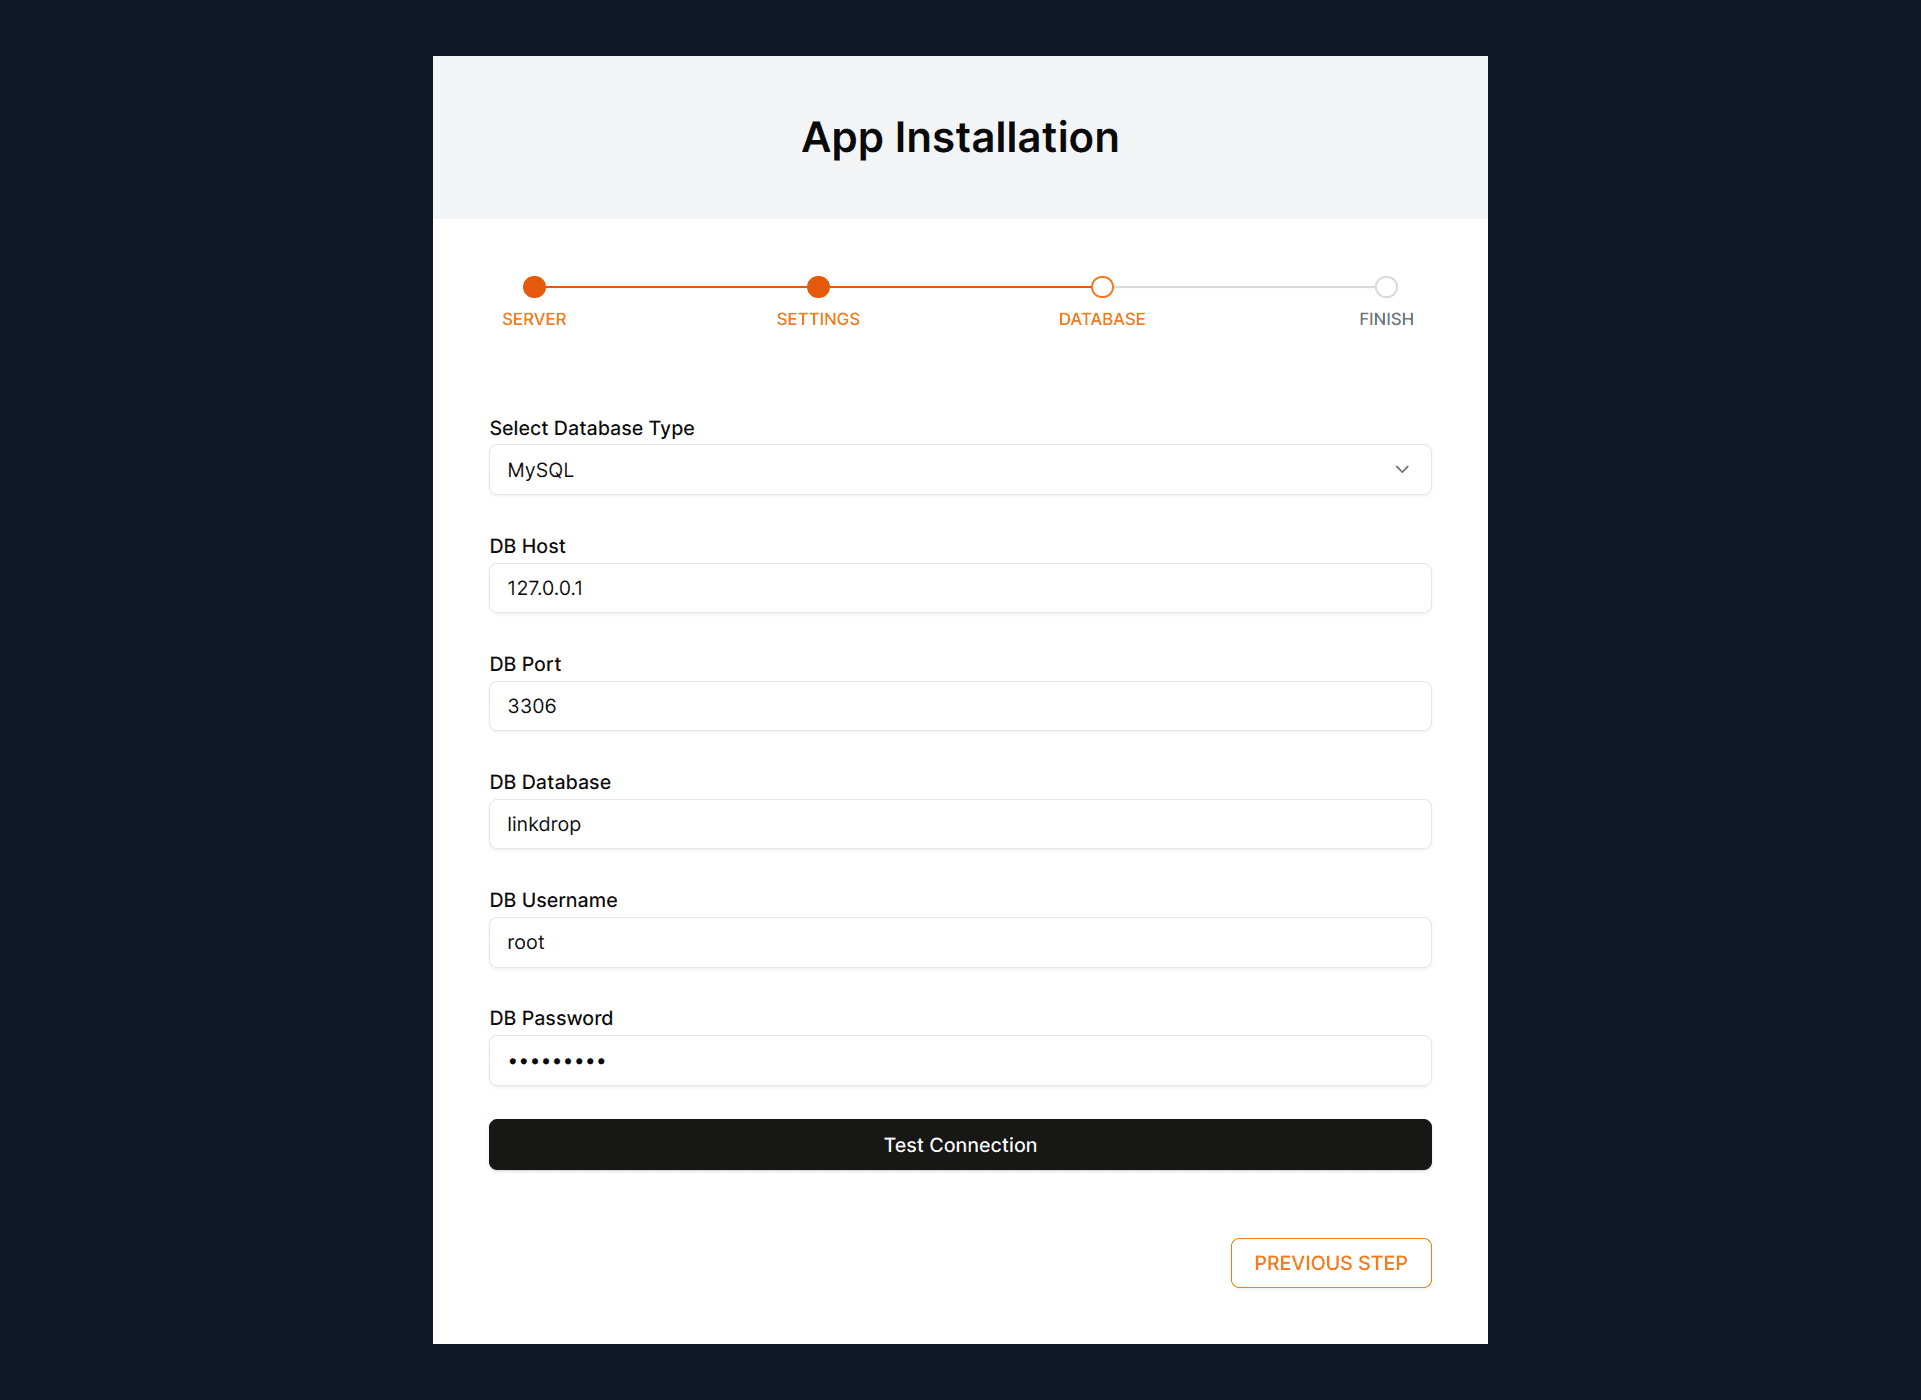
If the database connection is established then you will see the success message and you can go to the next step otherwise you can't go to the next step and you will see the error message.
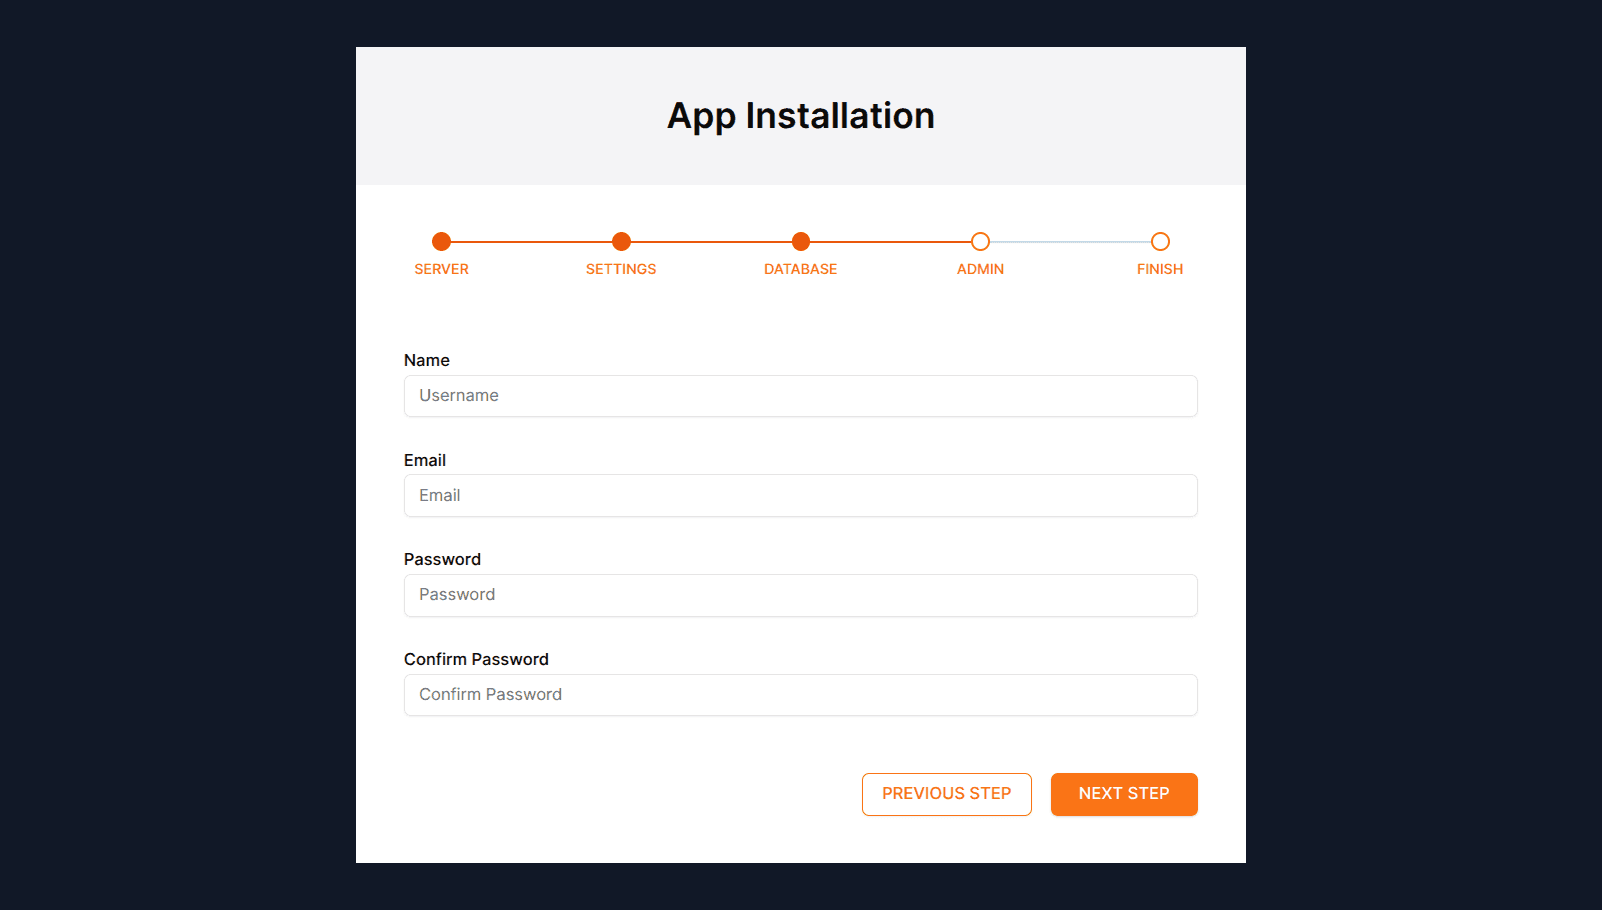
Step 4: Admin Setup
In this step, you need to create your admin account by providing your name, email, and password. This account will be used to access the admin dashboard after installation. Make sure to use a strong password and keep these credentials safe as they will be required for future admin access.
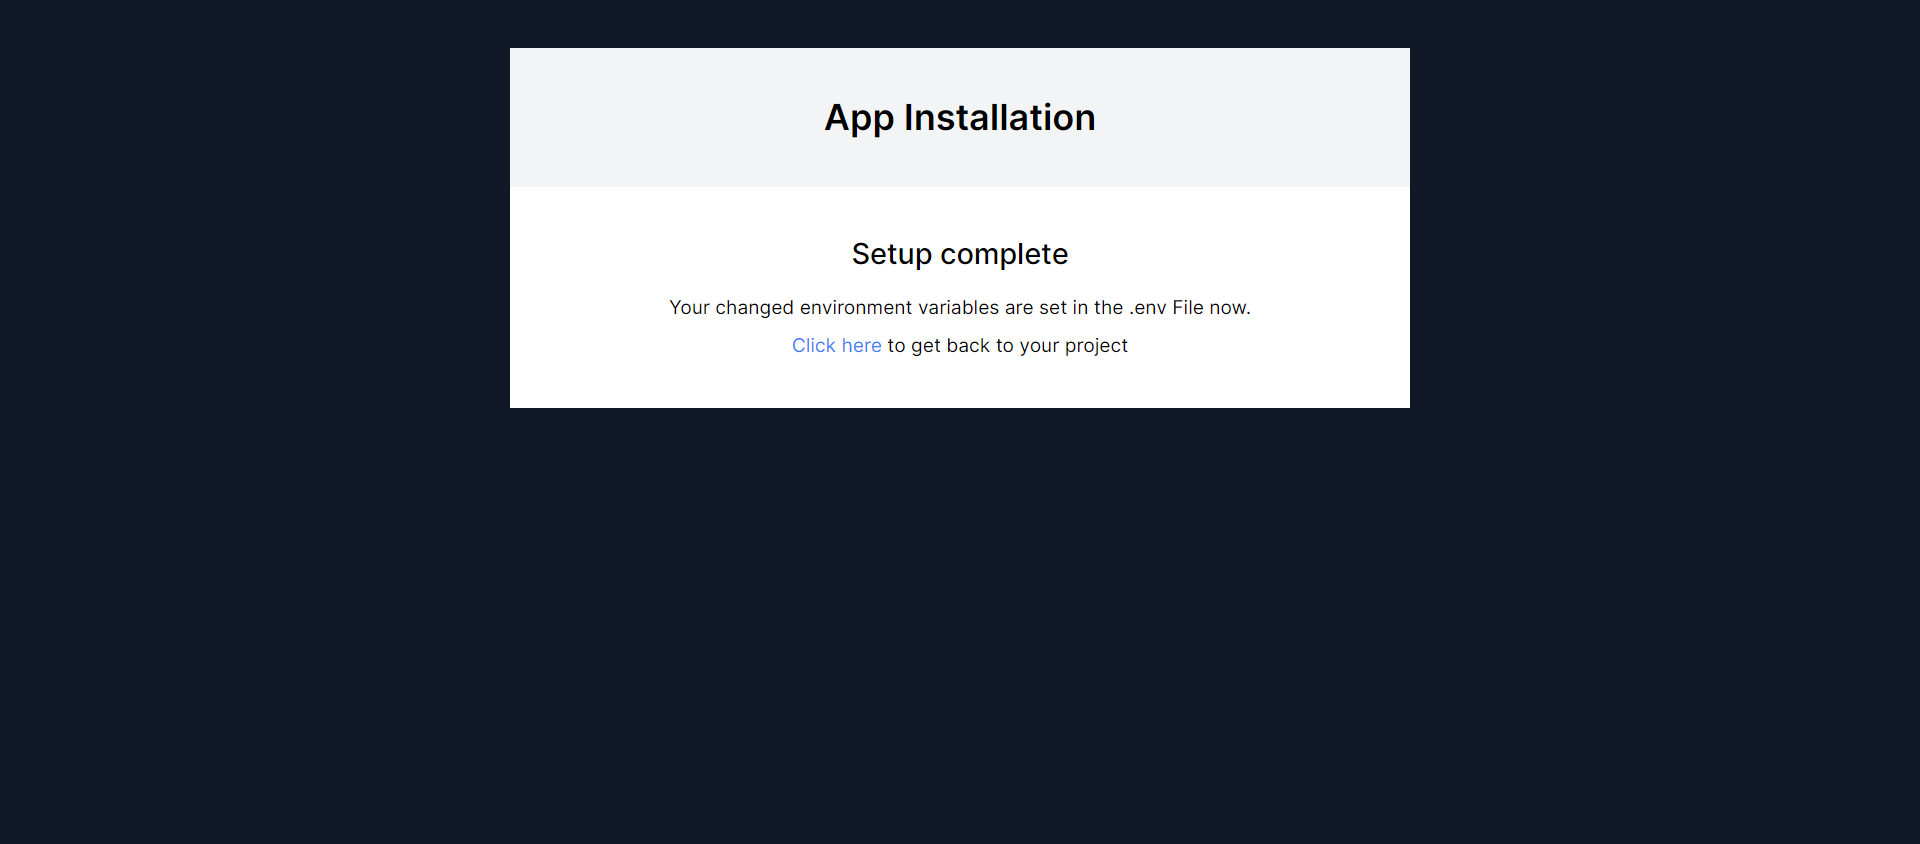
Step 5: Installation
Now here is the final step. By completing this step your installation will be complete.
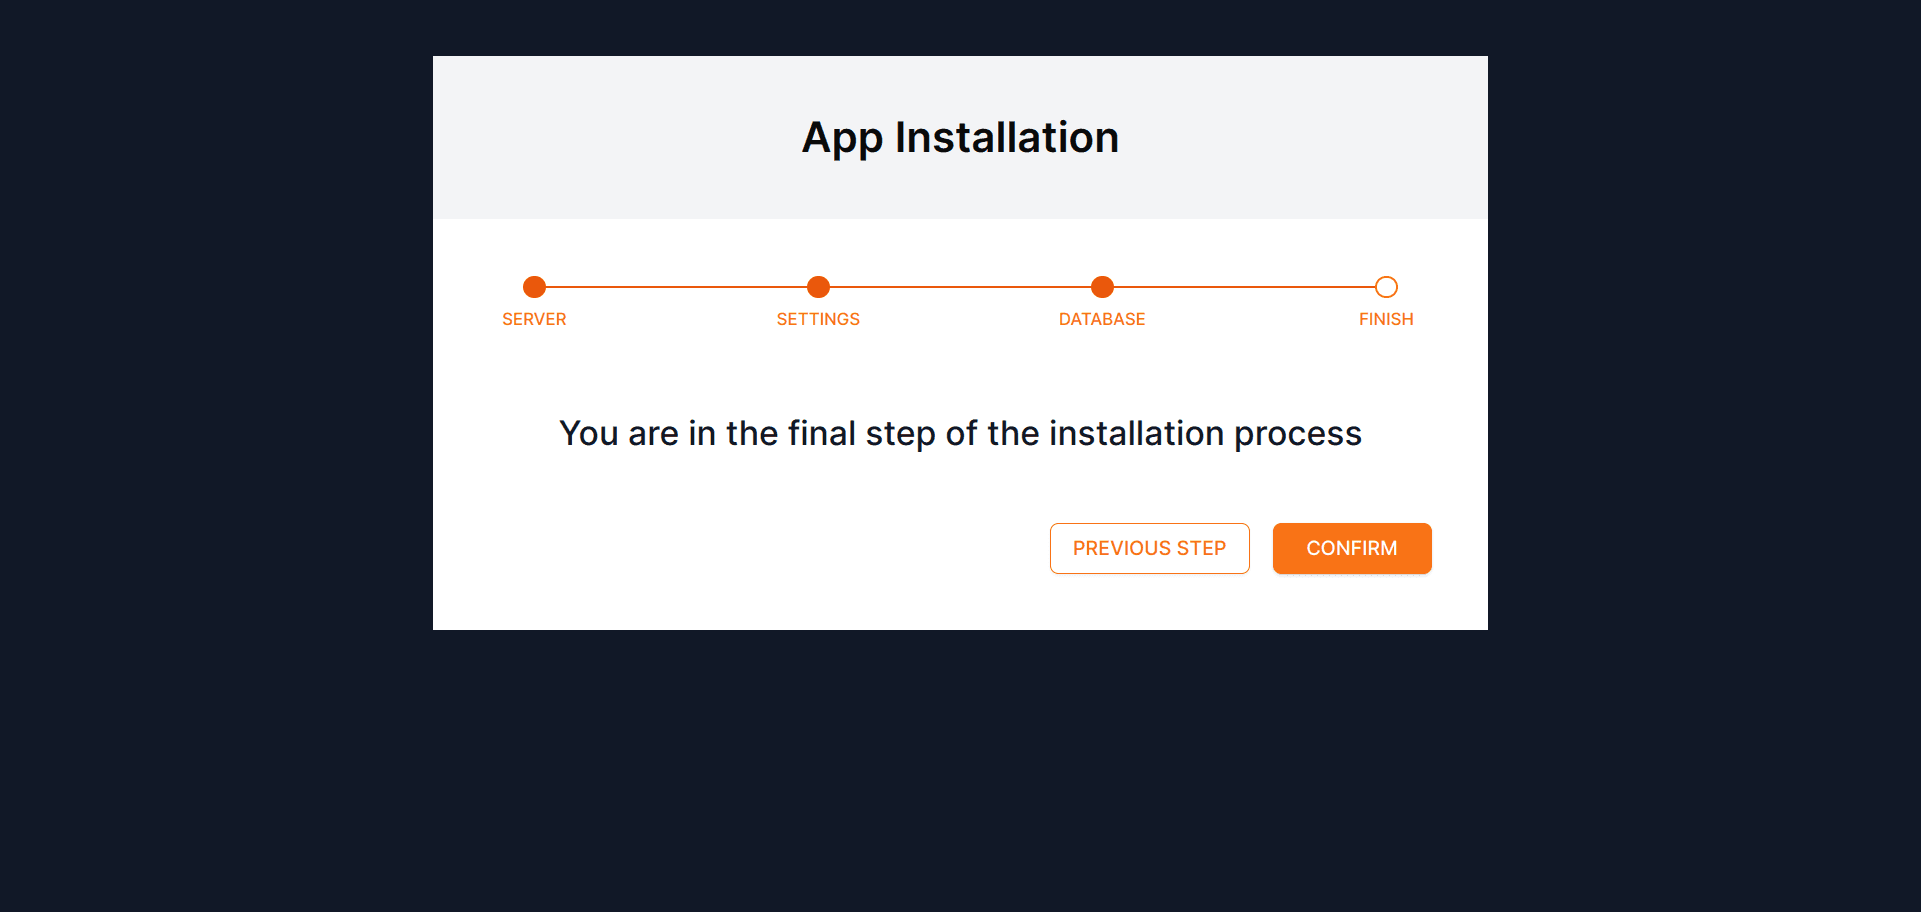
When your app installation is complete you will see the success message. That's it, your installation processes have been completed now.